¶ HOW TO Configure OAuth using custom apps and credentials
For PBXware version 7.4, Oauth has been updated so that users can create and use custom OAuth applications using Google and Microsoft as providers.
Users can still use basic SMTP configuration to set up SMTP connections manually.
NOTE: Before proceeding with OAuth configuration, confirm that your PBXware has a domain name assigned to it. Without this, OAuth authentication will not function correctly.
¶ OAuth App
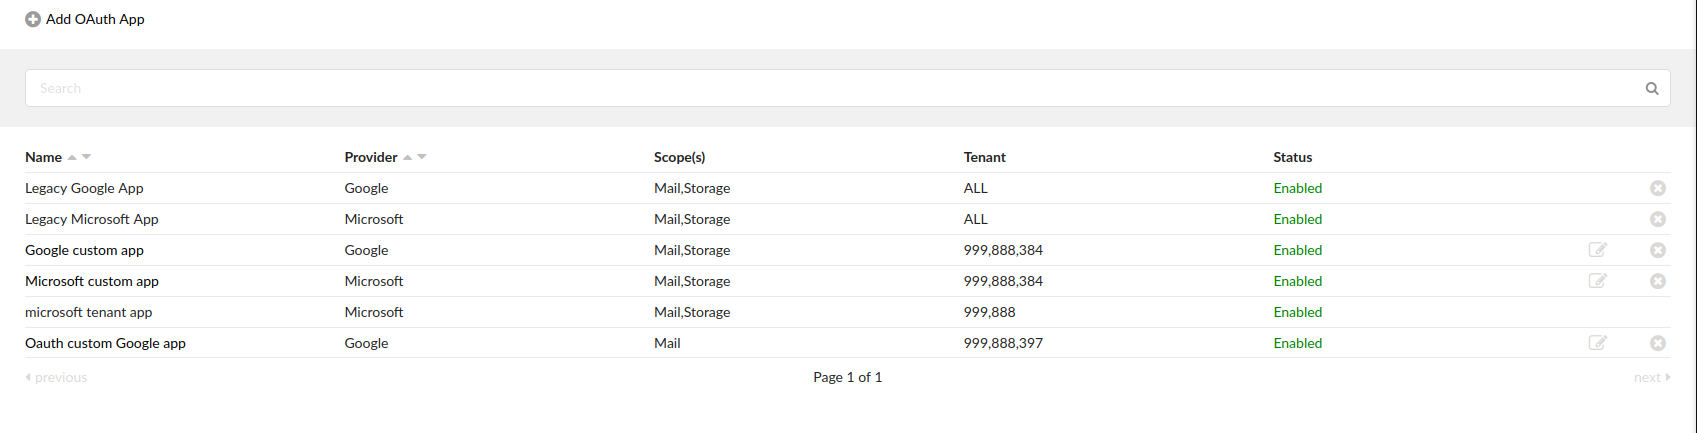
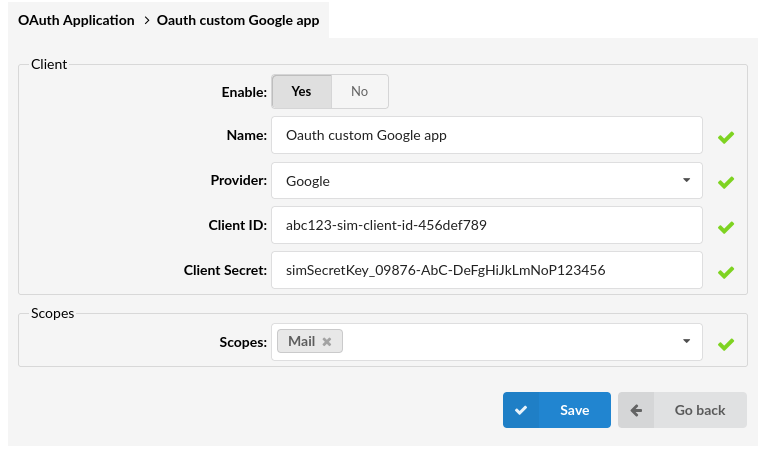
The first step is to add a custom Oauth Application. Populate the required fields and select one of the available providers (Google or Microsoft) and the scopes for that application (Mail or Storage).
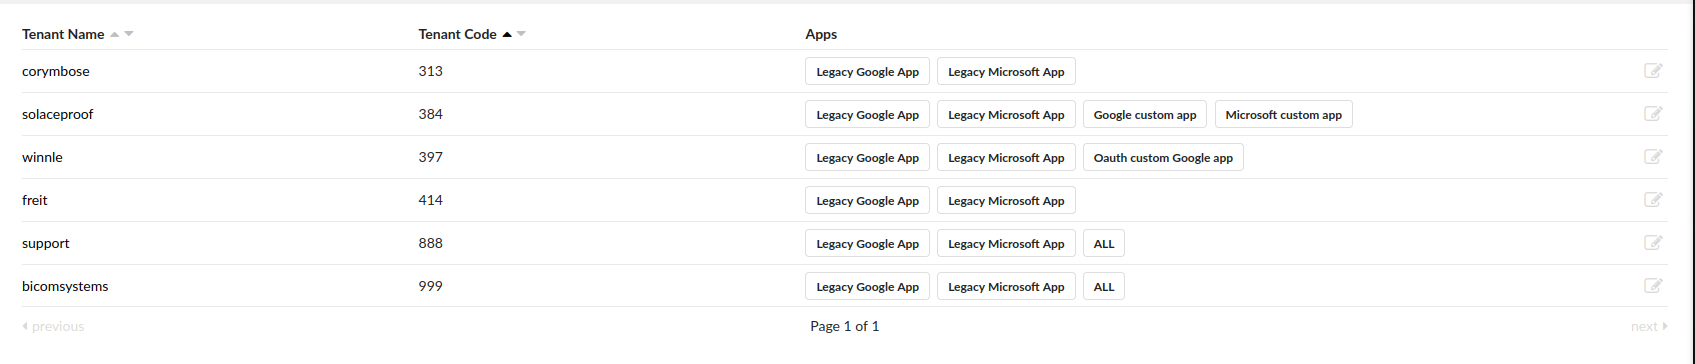
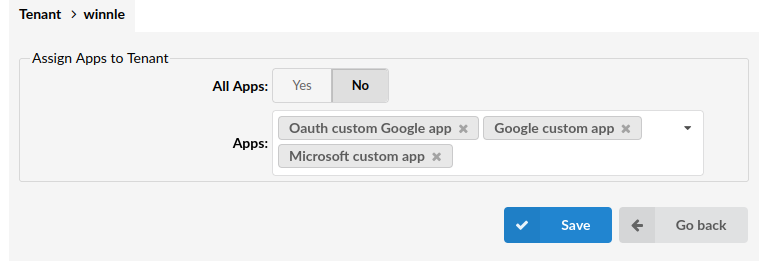
¶ Apps & Tenants
Apps & Tenants is a section reserved for the Multi-Tenant edition of PBXware.
Select the tenant and assign the application manually, or set All Apps to ‘Yes’ to assign all OAuth applications to the tenant.
When the application is assigned to a tenant, that application will be visible in the Oauth –> Apps on a tenant level and is available for use when creating the Credentials on a tenant level.
¶ Credentials
The Next step is to create credentials with the previously created OAuth application(s).

Populate the name that will be associated with those credentials, select the previously created Application from a dropdown menu, and select scopes.
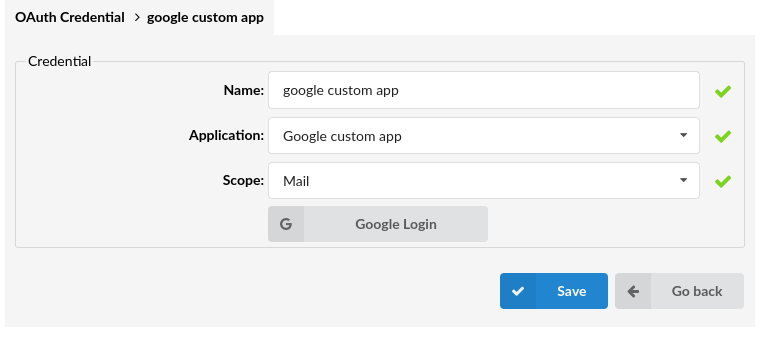
Scopes available for selection are the ones configured on the Application selected.
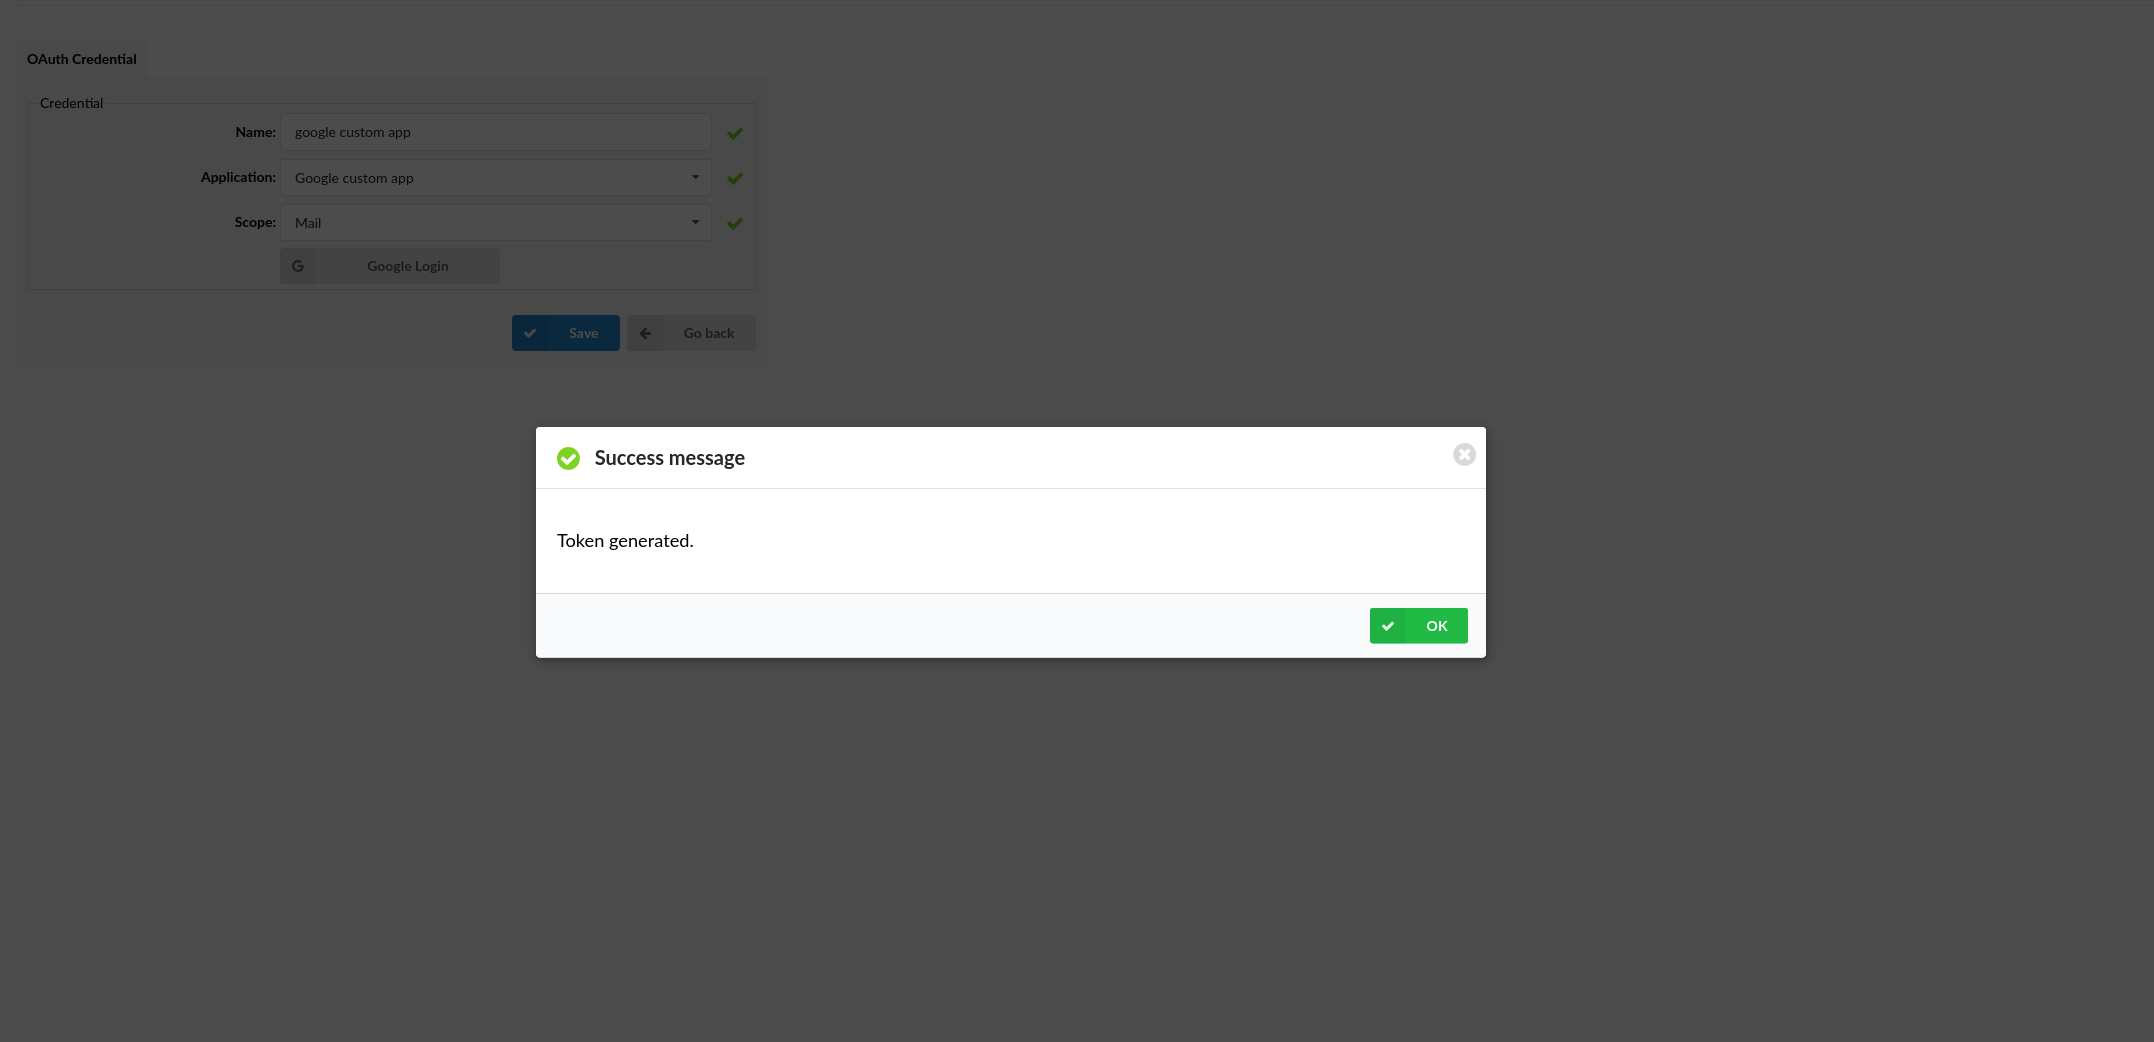
Once the required fields are populated, and the application selected, proceed with the Login.
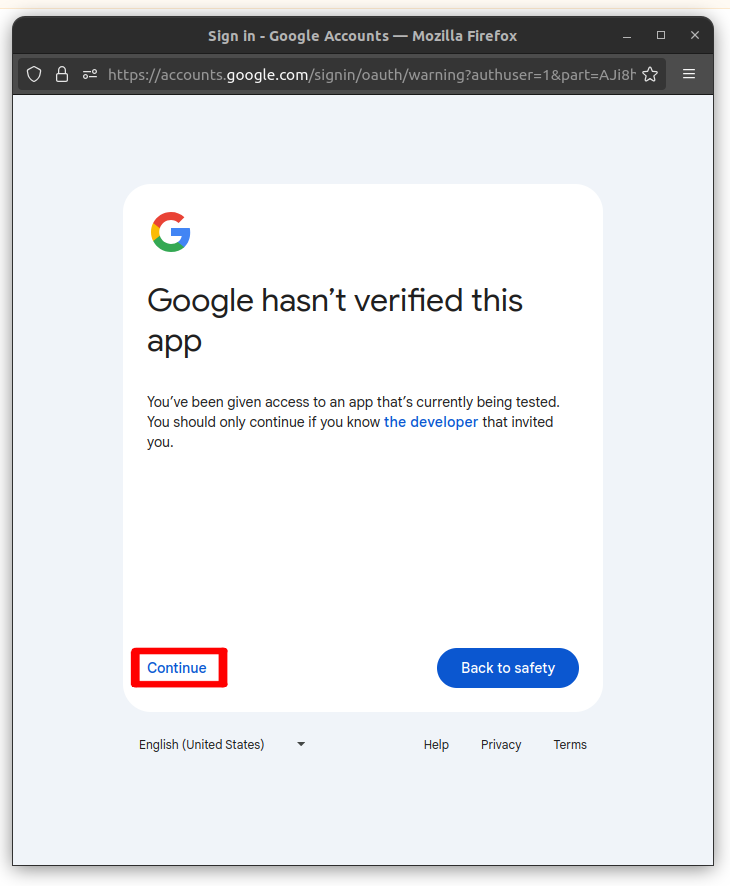
Please select the account you wish to use, and on the verification pop-up click continue to proceed.
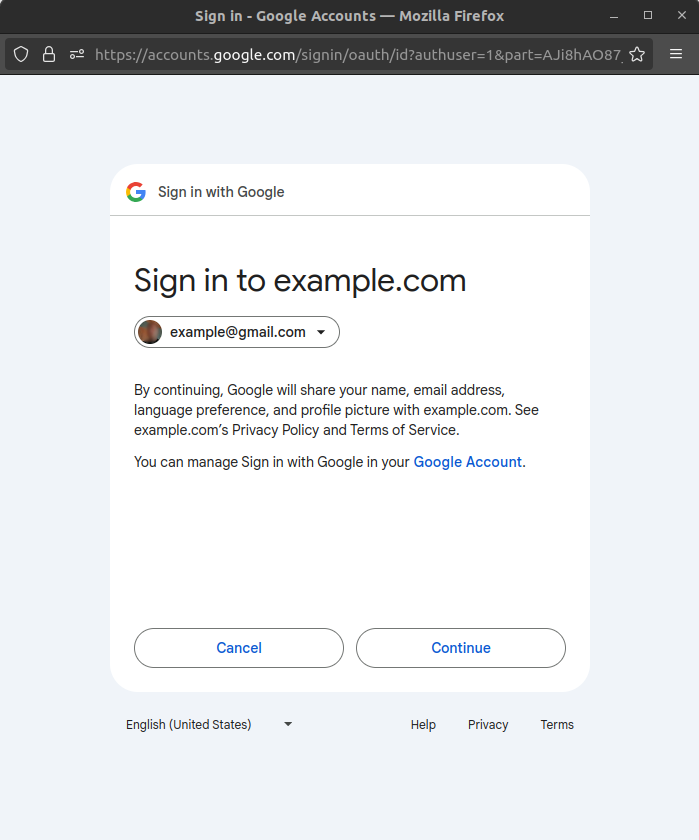
On the following screens click Continue to proceed.
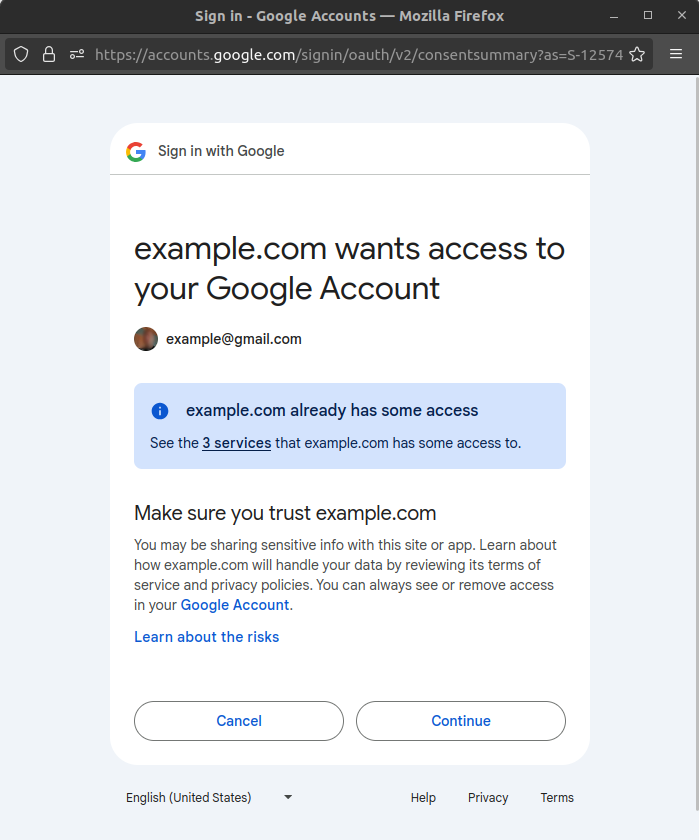
Once the verification is successful, a token is generated, and the OAuth app and the credentials are ready for use.
The final step is to navigate to the SMTP Configuration (Admin settings or Setup wizard) and select the application.
For instructions on how to configure SMTP, follow the link below: